Unix BSD/OS 4.3 Install on Qemu 386
Overview
A practical approach for the Qemu 386 install of the operating system from Berkeley Software Design BSD/OS 4.3 (2002). Installing and running a legacy Unix system is a great point of reference concerning the study and appreciation of older operating systems. BSD/OS 3.x to 5.x also install in a very similar way. The audience is experienced Unix and Linux administrators.
CLARIFICATION: This is the BSD/OS 4.3 version for i386 from 2002, and not the classic 4.3BSD Berkeley Unix for the VAX from 1986. For that install visit Install 4.3BSD Berkeley UNIX with VAX780 SimH Emulator and TCP/IP Networking
COPYRIGHT
The copyright declaration as seen inside the mounted ISO download:
$ cat COPYRGHT

BSD/OS Release 4.3
Copyright 2001 Wind River Systems, Inc.
Copyright 1992,1993,1994,1995,1996,1997,1998,1999,2000,2001
	Berkeley Software Design, Inc.

Portions Copyright by other entities, see individual modules for details.

Use of this software is governed by the Wind River Systems, Inc.
Software License.

If you do not accept the terms of this license, immediately return the
distribution to the place of purchase for a full refund. Further
use of the software will be considered to be acceptance of the terms
of the license.
Download
Download 4.3BSD [612MB]: https://archive.org/download/bsdos-4.3/bsdos-4.3-binary.iso
$ mkidr -p /u1/qemu/4.3bsd
$ cd /u1/qemu/4.3bsd
$ wget https://archive.org/download/bsdos-4.3/bsdos-4.3-binary.iso
Host Specs
Configurations used:
-
PC: Dell Optiplex Intel i7, 32G Mem, 1T SSD.
OS: Debian Linux 10.5 AMD64
Emulator: Qemu 3.1.0
Bridge Network: br0
Tunnel: tap0
Network Configuration
Bridged and tap network configuration.
$ sudo cp /etc/networks/interfaces{,.$RANDOM.bak}

$ sudo cat > /etc/network/interfaces <<EOF
auto lo
iface lo inet loopback
iface eth0 inet manual
auto br0
iface br0 inet static
	address 192.168.1.3
	network 192.168.1.0
	netmask 255.255.255.0
	broadcast 192.168.1.255
	gateway 192.168.1.1
	bridge_ports eth0
	bridge_fd 9
	bridge_hello 2
	bridge_maxage 12
	bridge_stp off
	dns-nameservers 192.168.1.1
	pre-up ip tuntap add dev tap0 mode tap user ramses
	pre-up ip link set tap0 up
	bridge_ports all tap0
	bridge_maxwait 0
	#bridge_fd      0
	post-down ip link set tap0 down
	post-down ip tuntap del dev tap0 mode tap
EOF

$ sudo systemctl restart networking

$ /sbin/ifconfig
br0: flags=4163<UP,BROADCAST,RUNNING,MULTICAST>  mtu 1500
        inet 192.168.1.3  netmask 255.255.255.0  broadcast 192.168.1.255

eth0: flags=4163<UP,BROADCAST,RUNNING,MULTICAST>  mtu 1500
        ether 98:90:96:e4:60:b5  txqueuelen 1000  (Ethernet)

tap0: flags=4163<UP,BROADCAST,RUNNING,MULTICAST>  mtu 1500
        ether fa:97:72:75:1b:3a  txqueuelen 1000  (Ethernet)
Prepare Disks
Extract the installation floppy image:
$ sudo mount -o loop bsdos-4.3-binary.iso /mnt
$ cp /mnt/FLOPPIES/INSTALL.img .
$ sudo umount /mnt
Create the hard drive image. It will not work with 4GB or bigger. I made mine 2GB. Also be sure to make it fully writable:
$ qemu-img create -f qcow2 bsd4.3.qcow2 2G
Formatting 'bsd4.3.qcow2', fmt=qcow2 size=2147483648 cluster_size=65536 lazy_refcounts=off refcount_bits=16

$ qemu-img info bsd4.3.qcow2
image: bsd4.3.qcow2
file format: qcow2
virtual size: 2.0G (2147483648 bytes)
disk size: 196K
cluster_size: 65536
Format specific information:
    compat: 1.1
    lazy refcounts: false
    refcount bits: 16
    corrupt: false
$ chmod 0666 bsd4.3.qcow2
Qemu Boot Script
cat > boot.sh << EOF
#!/bin/bash

FLP=INSTALL.img
CD=bsdos-4.3-binary.iso
HD=bsd4.3.qcow2
MEM=64m
BOOT=a

qemu-system-i386 -M pc -cpu 486 -m $MEM \
 -fda $FLP \
 -drive file=$CD,if=ide,index=1,media=cdrom \
 -hda $HD \
 -boot $BOOT -no-fd-bootchk \
 -net nic,model=ne2k_pci -net tap,ifname=tap0,script=no,downscript=no \
 -k en-us -rtc base=localtime 2>&1 &
EOF

$ chmod +x boot.sh
First Boot
Run the boot.sh script. To exit the Qemu screen press “Ctrl-Alt-G”.
$ ./boot.sh
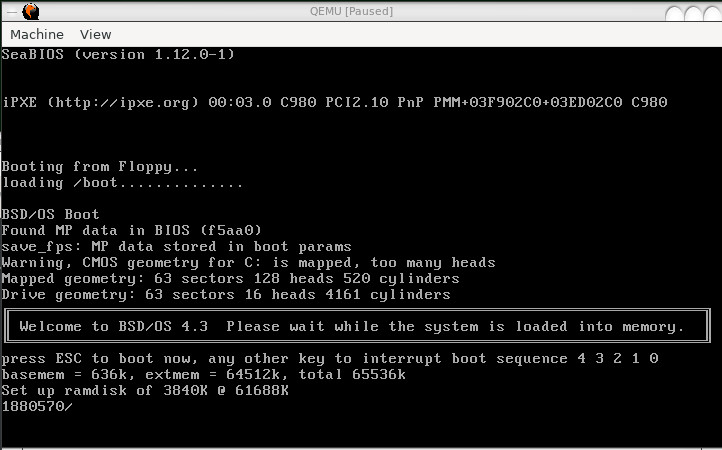
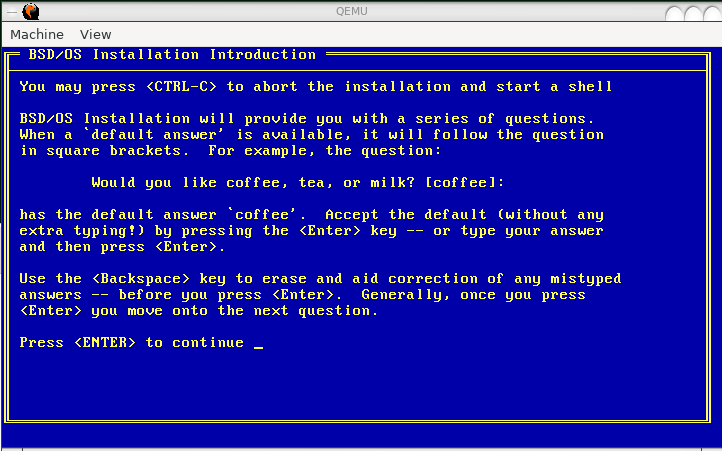
After a while it pops up a blue welcome screen. Do not go through the wizard. It will get you nowhere. We have to format the drives and install the packages manual. Press “Ctrl-C” or type “!shell” to exit to the prompt.
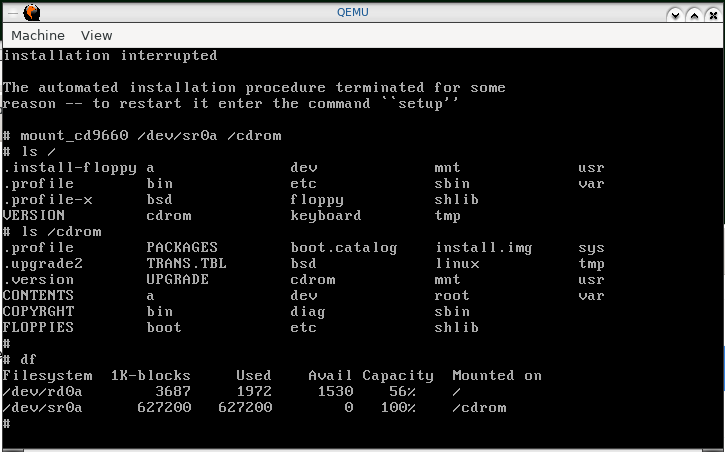
Mount CDROM
Mount the CDROM,
# mount_cd9660 /dev/sr0a /cdrom
Verify Networking
Make sure that networking is up and running and that you are able to ping the gateway and another machine. Here we are simply making sure that the networking does work. These settings are temporary and work only during the install. Additionally, networking settings during the install can function as an alternate installation method using an NFS mount on /cdrom. More on that later.
# ifconfig ne1
# ifconfig ne1 192.168.1.200 netmask 255.255.255.0
# route add default 192.168.1.1
# ping 192.168.1.1
Partition Hard Disk
Before formatting the virtual hard disk verify the physical disk parameters as seen by the kernel. This is sometimes necessary because BSD tends to use the last sectors of the disk for recording bad blocks. IDE disk is usually created as /dev/wd0 and SCSI is sd0. Record the number of sectors-per-track after running the disk setup command.
# disksetup wd0

bytes/sector: 512
sectors/track: 63
tracks/cylinder: 16
sectors/cylinder: 1008
cylinders: 4161
sectors/unit: 4194288
To calculate sectors units divide total bytes by the smallest block size of 512. Total size of 2GB = 2 to the power of 31. The bytes total should be a couple of bytes more than what is reported by the BIOS above:
$ echo "(2^31)/512" | bc
4194304
Default to the cdrom directory which has the bootstraps, run the interactive disk setup utility against the raw disk file /dev/rwd0, and answer the text wizard questions:
# cd /cdrom/usr/bootstraps/
# disksetup -i rwd0

Use an FDISK table? NO
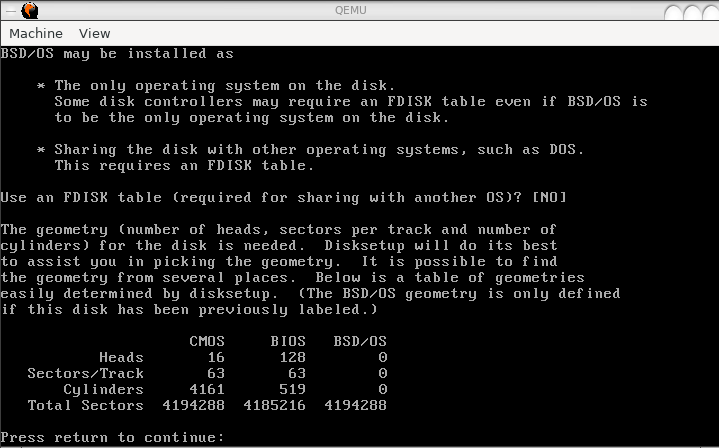
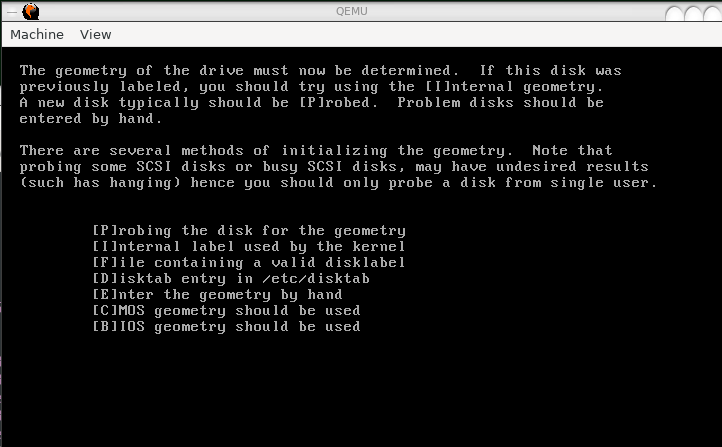
Next verify the geometry of and press Enter to continue. At the next screen press “C” to choose [C]MOS geometry.
Continue with the default answers:
Would you like to view or change the geometry? NO
Would you like to use standard BSD partition table? YES
Would you like to view/alter the BSD partition table created? NO
Do you wish to install new BSD/OS boot blocks? YES
What type of boot blocks do you wish to install? bios
Okay to write new disk label and BSD/OS boot blocks? YES
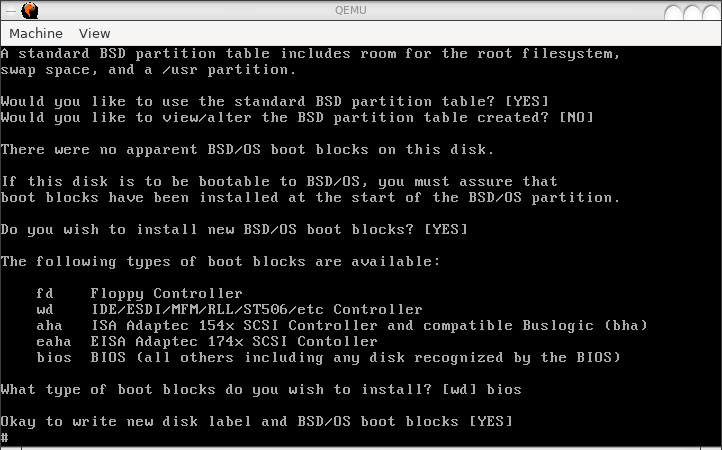
At this point your hard disk is partitioned and your boot block is set and ready to boot the Unix kernel. Run the disk setup utility one more time with no parameters in order to view the partitions.
# disksetup rwd0
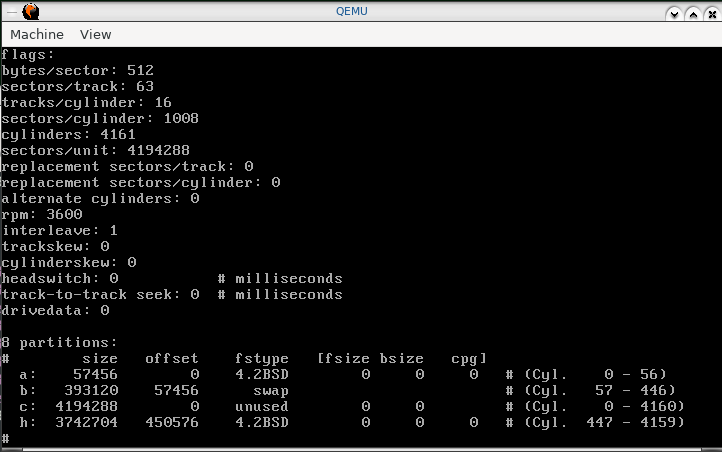
As seen above, BSD creates three partitions, “a”, “b” and “h” - root, swap and /usr/. Up to eight partitions per disk can be created, lettered from a to h. To calculate the default partition sizes in bytes multiply the number of blocks by the block size 512, then remove the last six numbers to return in megabytes.
$ a=`echo "57456*512" | bc` ; echo "${a::-6}"
29
$ a=`echo "393120*512" | bc` ; echo "${a::-6}"
201
$ a=`echo "3742704*512" | bc` ; echo "${a::-6}"
1916
-
/ = 29MB
swap = 201MB
/usr = 1916MB
Format Partitions
Create the BSD file system:
# newfs -O /dev/rwd0a
# newfs -O /dev/rwd0h
Ignore the “wd0: format error in bad-sector file”. Old-style UFS is not exactly 100% compatible with virtual disks.
Check the file systems:
# fsck -y -f /dev/rwd0a
# fsck -y -f /dev/rwd0h
Install Software
Mount the root and /usr/ directories to the temporary /a/, and install the software:
# mount /dev/wd0a /a
# mkdir /a/usr
# mount /dev/wd0h /a/usr
# df
# installsw -d /a -m cdrom
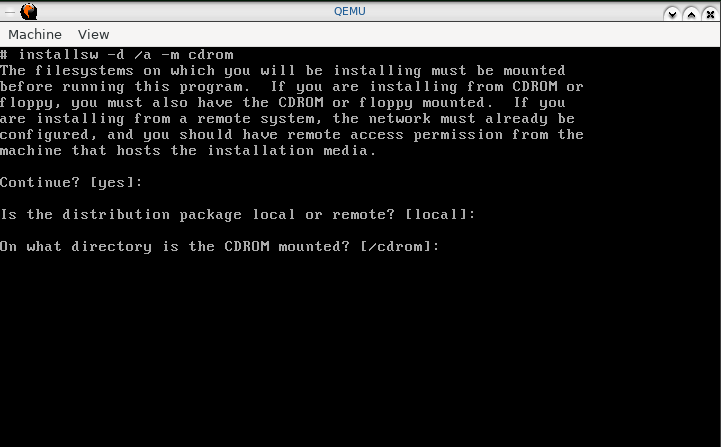
Next, disable all the unnecessary software by pressing the corresponding letter. Here I decide to not omit X11 and development packages, which I will not use for studying this OS.
gklmnopqrstuv
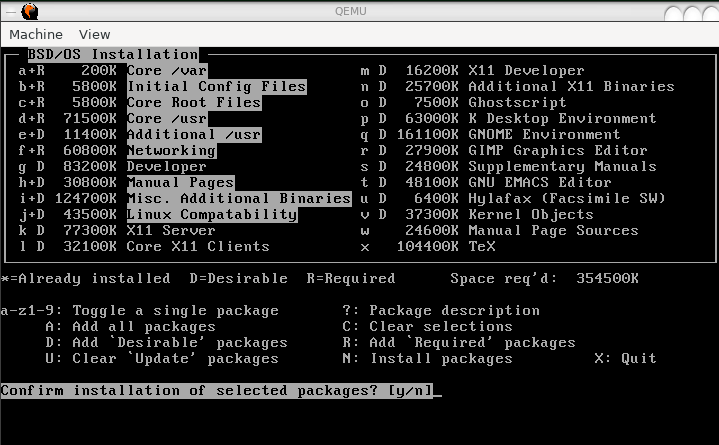
Press “N” when ready, then “y” to confirm. The packages should begin installing with a progress bar.
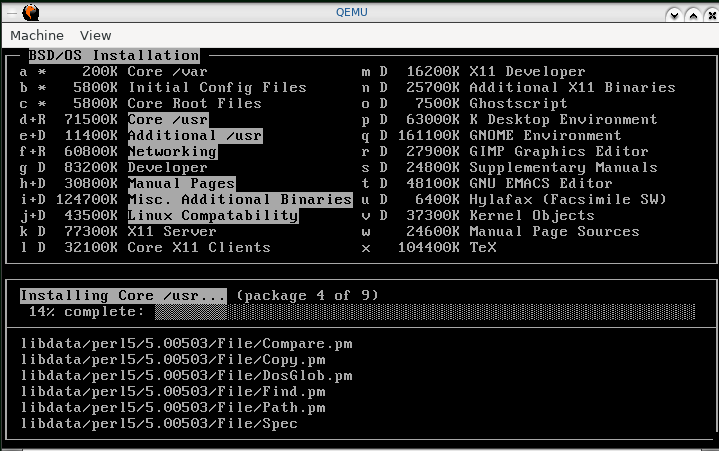
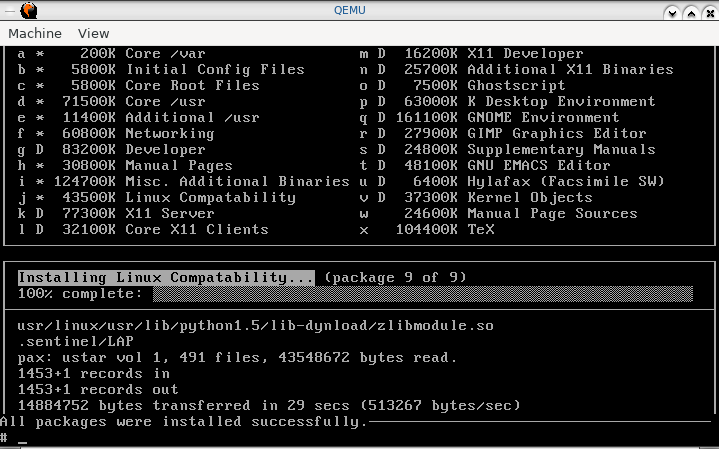
Take a 10 minute coffee break. At the end it should display “100% complete:” and “All packages were installed successfully.”
Copy Kernel, Mounts then Shutdown
Show the storage percentage consumed then copy the kernel.
# df
# cp /cdrom/bsd /a/
# cp /cdrom/boot* /a/
Create the file system tab. There is a sample file available for copy.
# cp /a/etc/fstab.sample.wd0 /a/etc/fstab
# cat /a/etc/fstab
/dev/wd0a /    ufs rw 0 1
/dev/wd0h /usr ufs rw 0 2
Dismount then gracefully shut down.
# sync
# cd /
# umount /a/usr
# umount /a
# umount -f /a
To shutdown simply close the Qemu window after the dismounts.
Boot to Disk
Boot to disk instead of the floppy by changing the BOOT parameter in the boot script.
# sed -i 's/BOOT=a/BOOT=c/g' boot.sh

# ./boot.sh
Final Boot
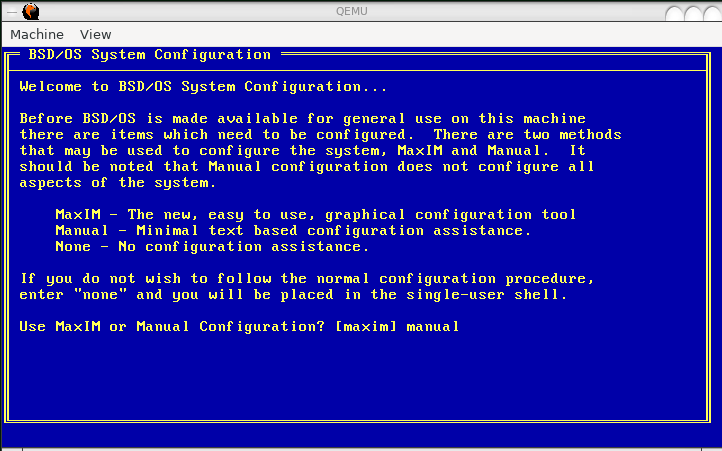
Type “manual” at the System Configuration screen, then press Enter.
.
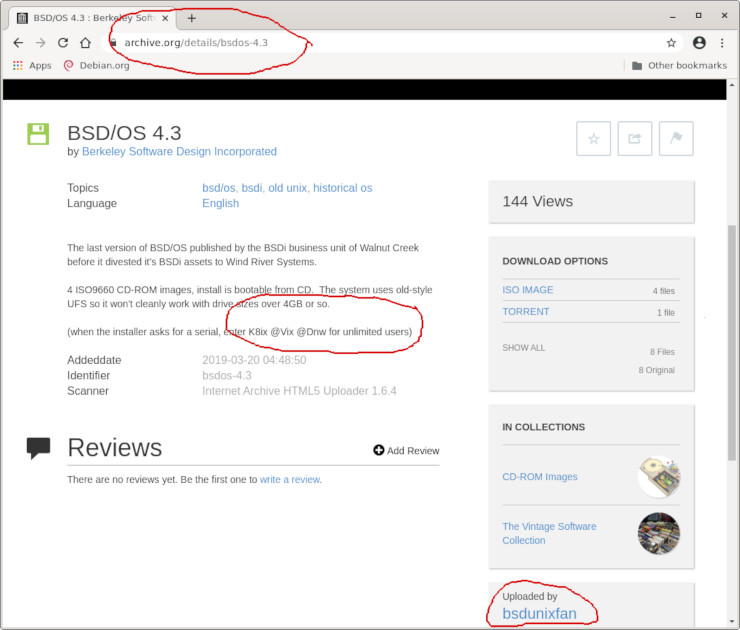
Enter unlimited license, as seen below, shown in https://archive.org/details/bsdos-4.3: “K8ix @Vix @Dnw”, then press Enter.
.
Follow the prompts and select your region and time zone.
Enter your machine name FQDN, such as: bsd43.example.com
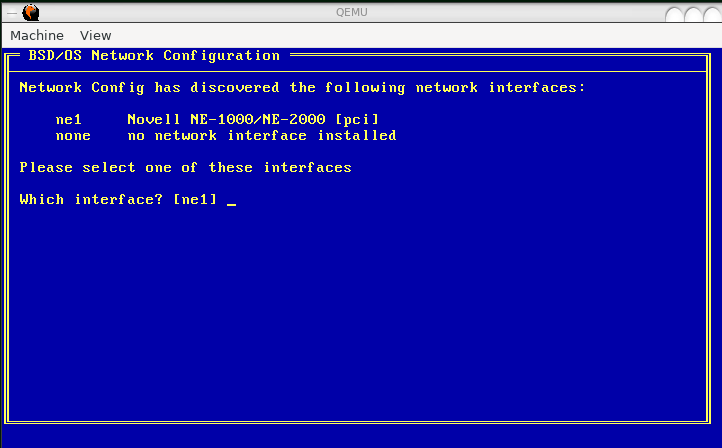
Next it should detect and display the NE2000 network car, to be selected.
Next type your static IP address, such as: 192.168.1.200, Netmask: 255.255.255.0, Gateway: 192.168.1.1.
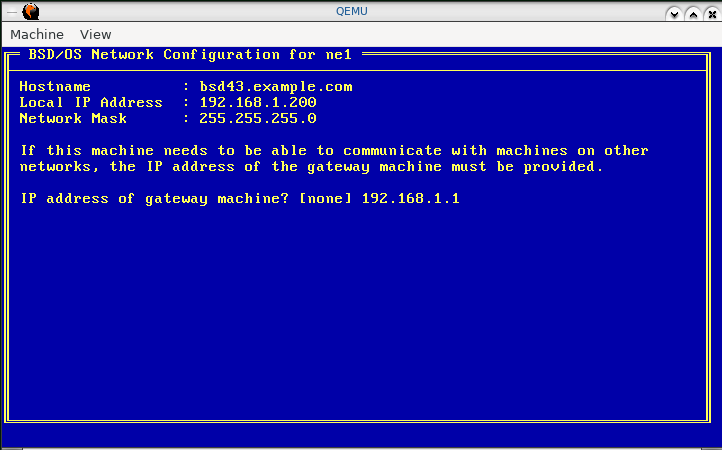
Last, it will ask you to confirm the changes, and after pressing Enter, the system will boot to a login prompt.
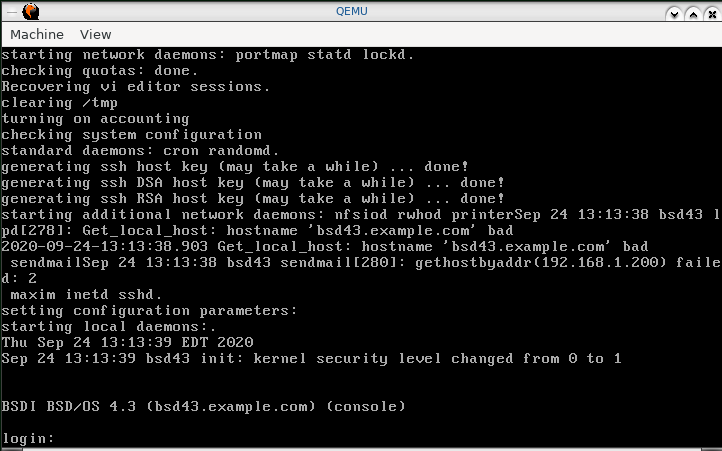
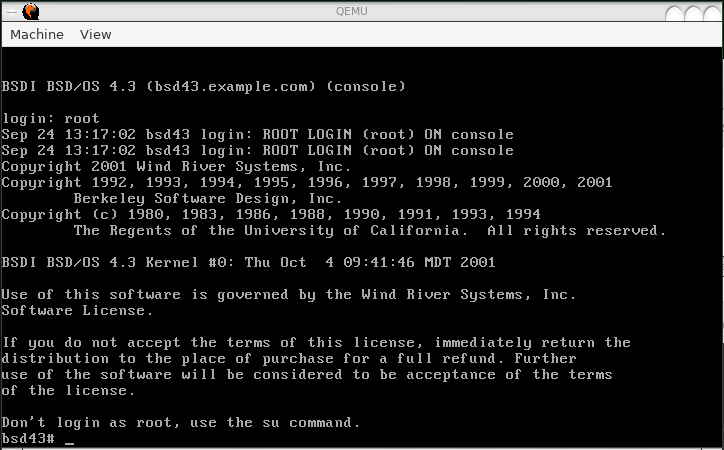
Login as root. It will not prompt you for the password the first time.
Links
Useful links for classic Unix enthusiasts and Unix historians:
https://gunkies.org/wiki
https://www.tuhs.org
https://archive.org/details/software?and%5B%5D=unix&sin=
https://computerhistory.org/blog/the-earliest-unix-code-an-anniversary-source-code-release
http://www.netside.co.jp/~mochid/comp/unix-on-sim/setup.html
https://hackaday.com/2019/11/17/unix-version-0-running-on-a-pdp-7-in-2019
The End.